Why Patio Paver Installation in South Florida Is Different Than What You See Online
You watched the YouTube video. The guy made it look easy — lay some sand, drop the pavers, sweep the joints, done. But that tutorial was probably filmed somewhere with clay soil and mild seasons. It wasn’t filmed in Broward County.
Patio paver installation in South Florida has to survive conditions that most DIY guides never mention. Sandy, shifting soil. Torrential summer rain that dumps inches in an hour. A water table that sits dangerously close to the surface in places like Pompano Beach and Deerfield Beach. Heat that softens polymeric sand before it even cures.
When any of those factors get ignored, pavers sink, shift, separate, and pool water against your foundation. This article breaks down what proper installation actually looks like here — and why cutting corners in this climate costs more than doing it right the first time.
What a Paver Patio Actually Requires — In Plain Terms
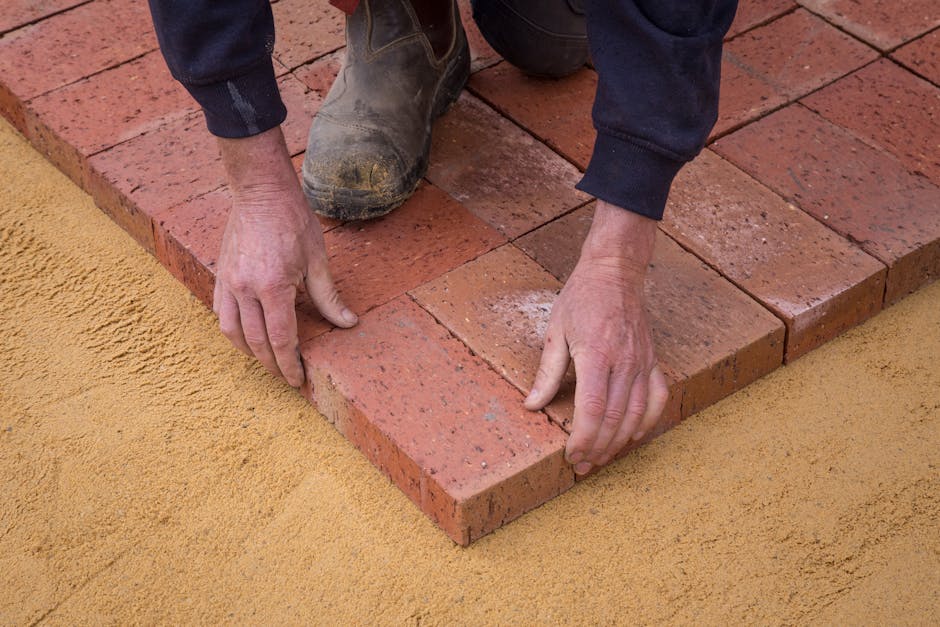
A paver patio isn’t just pavers sitting on dirt. It’s a layered system. Each layer has a job, and if any layer fails, the surface fails with it.
Here’s the basic anatomy from the ground up:
- Subgrade: The existing soil, excavated to the correct depth and compacted
- Base material: Typically crushed limestone or limerock, compacted in lifts
- Bedding layer: A thin, screeded layer of concrete sand that the pavers sit on
- Pavers: Interlocking units laid in a pattern with consistent spacing
- Joint sand: Polymeric sand swept into the joints and activated with water
- Edge restraint: A border system that locks everything in place
Skip any one of those layers — or do it loosely — and the patio starts moving. In South Florida, it starts moving fast.
Why South Florida’s Climate Destroys Shortcut Installations
Sandy Soil Doesn’t Compact Like You Think
Most of Broward County sits on fine, sandy soil with poor load-bearing capacity. Unlike clay-heavy soil up north, Florida sand drains quickly but shifts easily under weight. Without a properly compacted limerock base — usually six to eight inches deep for a residential patio — pavers will settle unevenly within months.
This is the number one reason DIY paver patios fail here. The base wasn’t deep enough, wasn’t compacted in lifts, or wasn’t the right material. A plate compactor from the hardware store helps, but it doesn’t replace knowing what compaction density the subgrade actually needs.
Heavy Rain Exposes Every Weakness
South Florida’s wet season brings 60+ inches of rain annually, often in sudden, heavy downpours. Water finds every gap. If your base doesn’t drain properly, water collects underneath the pavers and erodes the bedding sand. That’s when you see pavers rocking, dipping, or creating low spots that pond water.
Proper patio paver installation in South Florida accounts for drainage pitch — typically a minimum slope of one inch per eight feet away from any structure. It also means grading the subgrade itself, not just the surface. A flat-looking patio that drains well is actually engineered underneath.
Heat and UV Break Down Joint Sand Prematurely
Polymeric sand needs to cure properly. In Fort Lauderdale’s summer heat, surface temperatures on pavers can exceed 150°F. If polymeric sand gets activated by an unexpected afternoon storm before it’s fully set, or bakes too fast in direct sun, it won’t bond correctly. The result is washed-out joints, weed growth, and ant hills within the first season.
Experienced installers time this step carefully — often working early mornings or watching weather windows. It’s a small detail that makes or breaks longevity.
Water Table and Flood Zone Realities
In low-lying areas of Hollywood, Dania Beach, and parts of Pompano Beach, the water table can sit just a couple feet below grade. That affects how deep you can excavate and what base materials perform best. In some flood-prone zones, permeable paver systems may be preferred — or even required — to manage stormwater on-site. Florida’s statewide stormwater management guidelines, outlined through the Florida Department of Environmental Protection, influence how hardscape projects handle runoff in sensitive areas.
A DIY project rarely accounts for any of this. A licensed contractor checks it before breaking ground.
When DIY Can Work — And When It Can’t
Let’s be honest: not every paver project needs a general contractor. A small stepping-stone path through a garden bed? A four-by-four accent area around a fire pit that sits on an existing concrete slab? Those are reasonable weekend projects.
However, once a paver patio reaches a meaningful size — say 200 square feet or more — or sits adjacent to a structure, the stakes change. Here’s when hiring a licensed contractor makes practical sense:
- The patio is attached to or near your home’s foundation
- The area has poor drainage or known standing water issues
- You’re in a flood zone or your lot has a high water table
- The project involves removing an existing slab or regrading the yard
- You want the patio to support an outdoor kitchen, pergola, or future screen enclosure
- You plan to sell the home and want permitted, insurable improvements
If two or more of those apply, the project has moved beyond DIY territory. The cost difference between doing it yourself and hiring a professional is almost always less than the cost of tearing it out and redoing it in two years.
What to Ask Before Hiring a Paver Patio Contractor in Broward County
Not all contractors handle paver work the same way. Here’s what to verify before signing anything:
- Base depth and material: Ask specifically how deep the base will be and what material they’re using. In Broward County, six inches of compacted limerock is a common minimum for patios. If someone quotes you a two-inch sand base and nothing else, walk away.
- Compaction method: Are they compacting in lifts with a plate compactor? Or just dumping and leveling? This matters.
- Drainage plan: Where does the water go? A good paver patio contractor in Broward County will address grading and pitch before talking about paver color.
- Edge restraint: Ask what system they use. Plastic edging with spikes is standard for residential, but it needs to be installed on compacted base — not loose soil.
- License and insurance: Verify their license through the Florida DBPR license portal. This protects you if anything goes wrong.
These aren’t trick questions. Any contractor who does this work properly will answer them without hesitation.
What Homeowners Typically Underestimate
The paver material itself is usually the smallest part of the budget. What drives cost is excavation, base material, hauling, compaction, and labor. In Broward County, a professionally installed paver patio often falls between $15 and $30 per square foot depending on paver selection, site conditions, and access. That range moves when grading is complicated or the existing surface needs demolition.
Also underestimated: the timeline. A proper patio paver installation in South Florida isn’t a one-day job for most residential-scale projects. Excavation, base prep, compaction, screeding, laying, cutting, and joint sand activation — that’s a sequence, and rushing it leads to exactly the failures this article describes.
Finally, maintenance matters. Even a professionally installed patio needs joint sand replenishment every few years and occasional cleaning. But a well-built patio needs maintenance. A poorly built one needs replacement.
The Right Next Step
If you’re planning a paver patio in Broward County and want to understand what proper installation looks like for your specific yard — soil conditions, drainage, size, and budget — the next step is a straightforward conversation. Oak Park Construction handles paver patio projects across Pompano Beach, Fort Lauderdale, Hollywood, and surrounding areas with the base prep and site work that South Florida actually demands. Reach out to request a realistic scope and estimate for your project.